
PART 9: Forecourt Manager- Add User Profiles & Attendants
The suggested setup is as follows.
Use this map to configure profiles and attendants in Forecourt Manager.

To begin configuration
Navigate to:
- C:\Program Files\POSTEC\Focus (for 32 bit)
- C:\Program Files (x86)\POSTEC\Focus (for 64 bit)
- Run Forecourtmanager.exe as Administrator
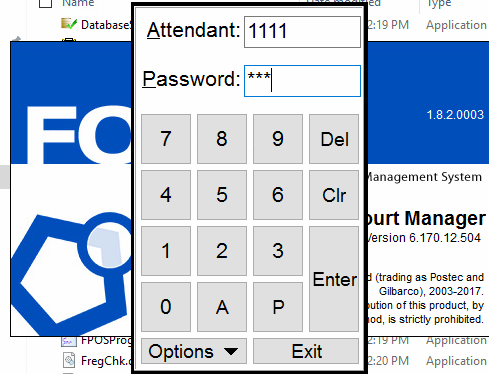
This will display an Attendant logon Screen:
By Default:
Attendant: 1111
Password: 123
- The first step is to setup User Profiles (similar to our user security in Idealpos).
- Giving the ability to use or not use certain feature of focus. To do this.
Add User Profiles
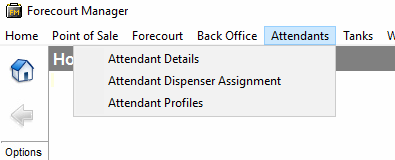
Navigate to: Attendants > Attendant Profiles
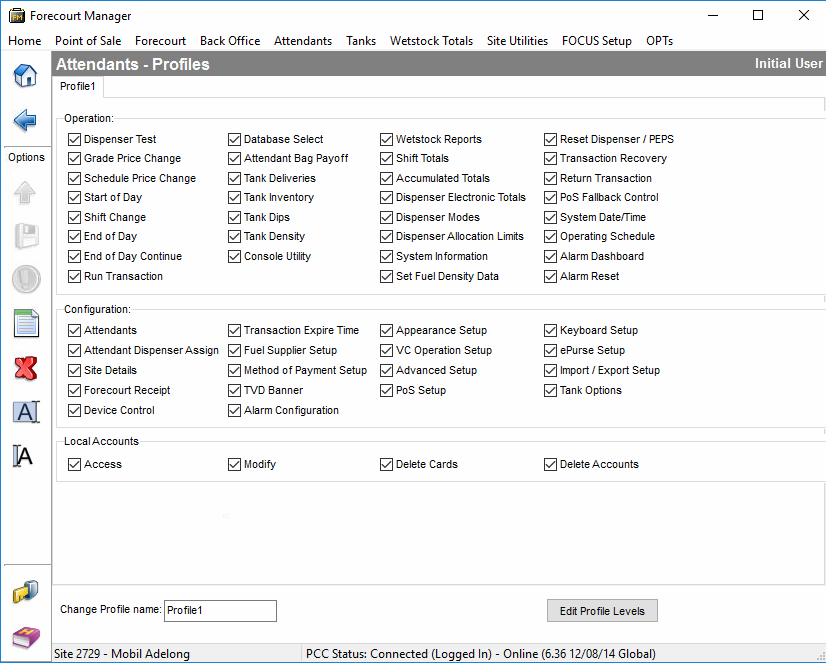
- See the images below for setting the Four Profiles
- Profile 1 is already setup with all the boxes ticked. Ensure all boxes are checked.
Profile 1 – Administrator Profile
- Push this Button to Create a new Profile

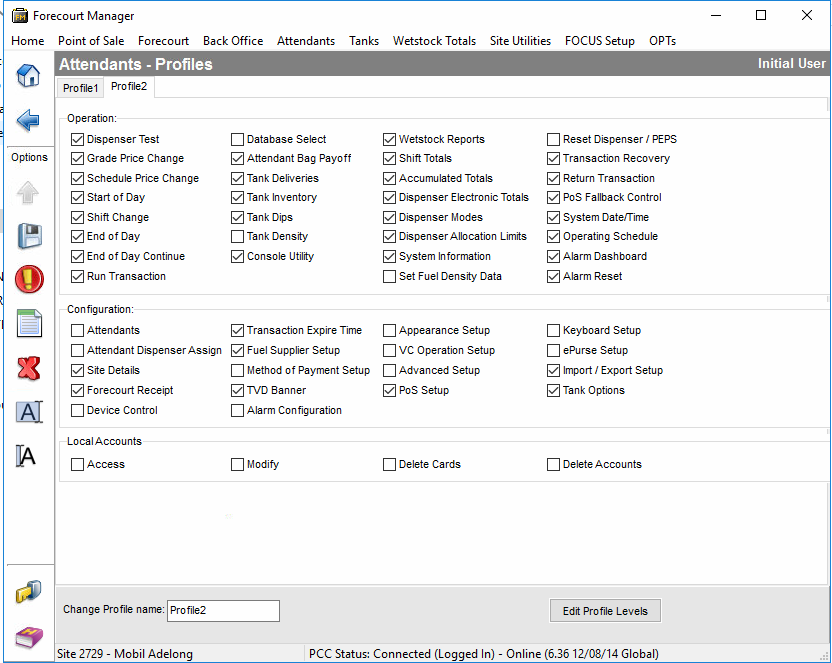
Profile 2 – Operator Profile
- This is the Operator Profile it allows them to do what they need without the ability to Reset Dispensers.
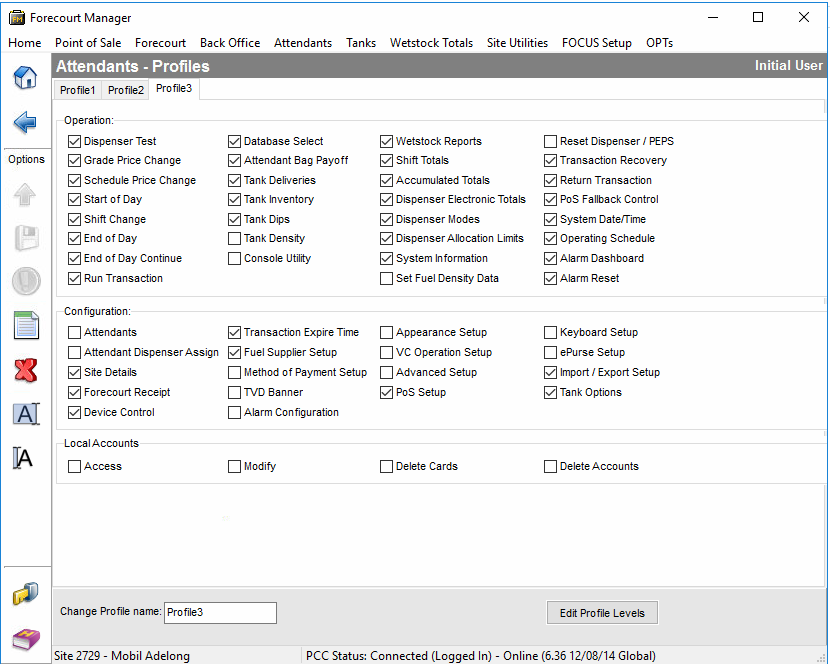
Profile 3 Manager Profile
- This is the Manager Profile it allows them to do what they need without the ability to do pump resets.
Profile 4 Reset Dispenser
- This is the Dispenser Reset Profile it allows them to do nothing else apart from Reset Dispensers
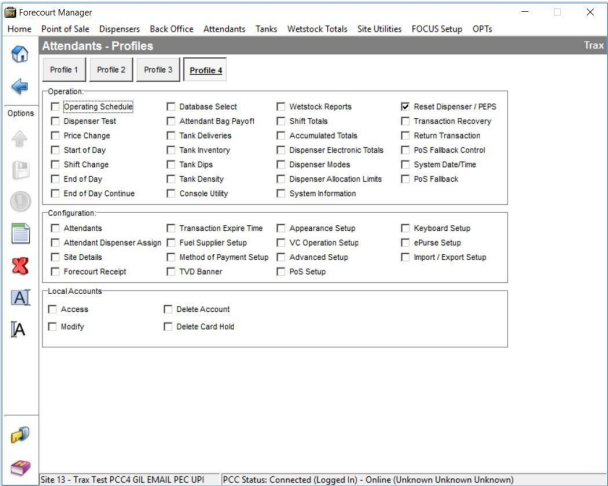
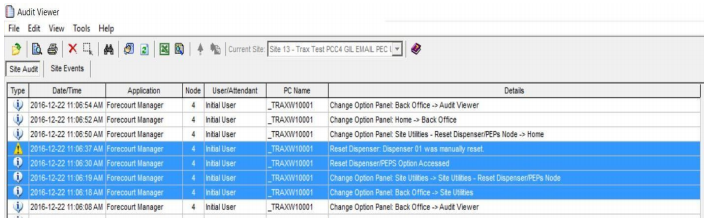
- The reason behind Profile 4 is the ability to make sure the pumps are not being reset by anyone using their normal login. Any Resets that are performed will appear in the Audit Viewer Logs.
- You can export the Audit file to excel and do a filter to find the resets.
Setup Attendants
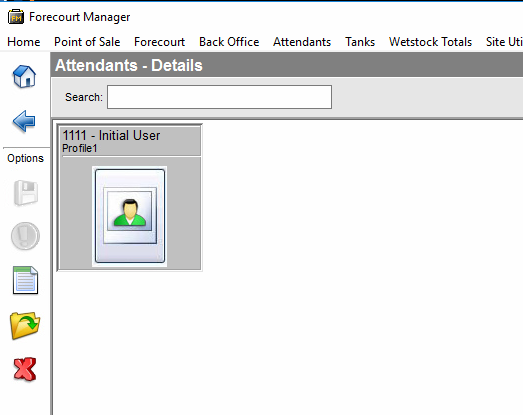
Navigate to: Attendants > Attendant Details

- In the window below you will see the default attendant.
- Double click on the Attendant to Edit.
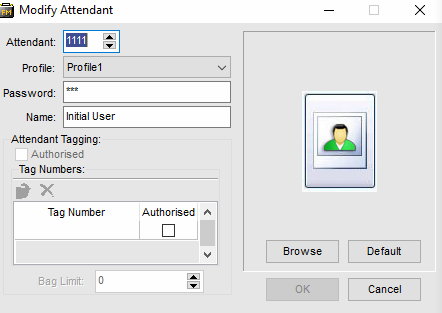
- You can then modify the attendant profile to another profile and Click OK
- To add a new attendant, click on

- This will pop up the window above with a new attendant. You can then change the Attendant Code, Password and Profile. Following the specs below.
- Once complete. Click


The User Profiles and Attendants are now configured.
Continue to PART 10: Setting up Integration Mode / Adjusting Visual Console Appearance
PART 1: Installing Firebird Database
https://help.idealpos.co/part-1-installing-firebird-database
PART 2: Installing Focus Suite
https://help.idealpos.co/part-2-installing-focus-suite
PART 3: Grant Windows permissions on Idealpos & POSTEC Related Folders
https://help.idealpos.co/part-3-grant-windows-permissions-on-idealpos-postec-related-folders
PART 4: Opening Ports for the Firebird Database | Specify Ports for Firebird
https://help.idealpos.co/part-4-opening-ports-for-the-firebird-database
PART 5: Registering the Firebird Database
https://help.idealpos.co/part-5-registering-the-firebird-database
PART 6: PCC Network Setup & Connection Wizard (Single and MultiPOS)
https://help.idealpos.co/part-6-pcc-network-setup-connection-wizard
PART 7: Request Forecourt Configuration from the PCC
https://help.idealpos.co/part-7-request-forecourt-configuration-from-the-pcc
PART 8: Installing POSTEC License file
https://help.idealpos.co/part-8-installing-postec-licence-file
PART 9: Forecourt Manager- Add User Profiles & Attendants
https://help.idealpos.co/part-9-forecourt-manager-add-user-profiles-attendants
PART 10: Setting up Integration Mode / Adjusting Visual Console Appearance
https://help.idealpos.co/part-10-setting-up-integration-mode-/-adjusting-visual-console-appearance
PART 11: Idealpos Configuration and Start up sequence.
https://help.idealpos.co/part-11-idealpos-configuration-and-start-up-sequence
PART 12: Configuring the Master Database
https://help.idealpos.co/configuring-postec-master-database
PART 13: Setting up Windows Sharing for Master Database Configuration
https://help.idealpos.co/setting-up-windows-sharing-for-master-database-configuration