
Part 4: Opening Ports for the Firebird Database
Option 1
- Copy the text below into a text file and name it “FirebirdPorts.bat”
- Right Click the file and Run as Administrator
ECHO OFFset PORT=3050set RULE_NAME="Firebird Primary"netsh advfirewall firewall show rule name=%RULE_NAME% >nulif not ERRORLEVEL 1 ( rem Rule %RULE_NAME% already exists. echo There is already a rule by that name, you cannot put another one in!) else ( echo Rule %RULE_NAME% does not exist. Creating... netsh advfirewall firewall add rule name=%RULE_NAME% dir=in action=allow protocol=TCP localport=%PORT%)set PORT1=4560set RULE_NAME1="Firebird Guardian"netsh advfirewall firewall show rule name=%RULE_NAME1% >nulif not ERRORLEVEL 1 ( rem Rule %RULE_NAME1% already exists. echo There is already a rule by that name, you cannot put another one in!) else ( echo Rule %RULE_NAME1% does not exist. Creating... netsh advfirewall firewall add rule name=%RULE_NAME1% dir=in action=allow protocol=TCP localport=%PORT1%)PAUSE
Alternatively, download the attached FirebirdPorts.bat file and Run as Administrator
Option 2
- Go to Control Panel\System and Security\Windows Firewall
- Click Check on Firewall Status.
- Click on Advanced Settings
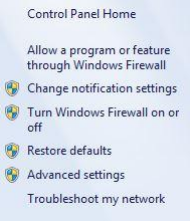
- Click on Inbound Rules
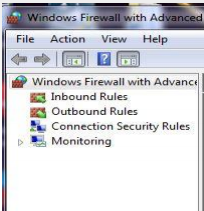
- Click on New Rule
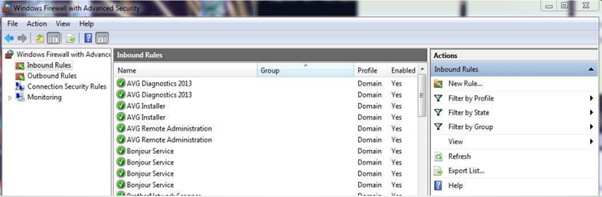
- The dialogue box will open.
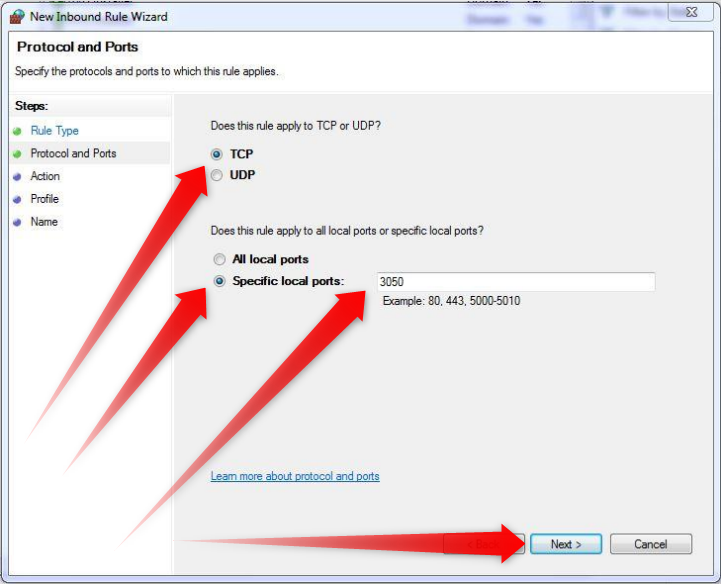
- Click on Port, then click next.
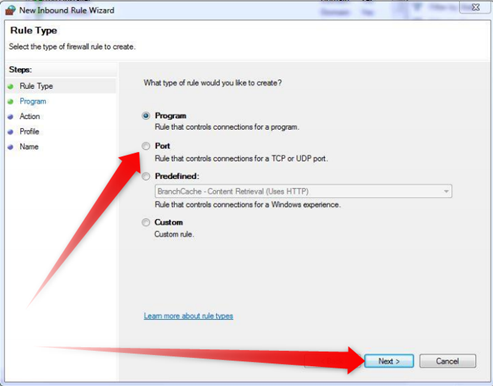
- Tick TCP, then Specific Port. Type, “3050” then hit next
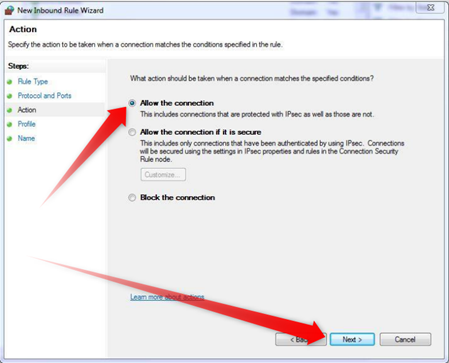
- Click “Allow the Connection” then “Next”
- Leave Domain, Private, Public all ticked.
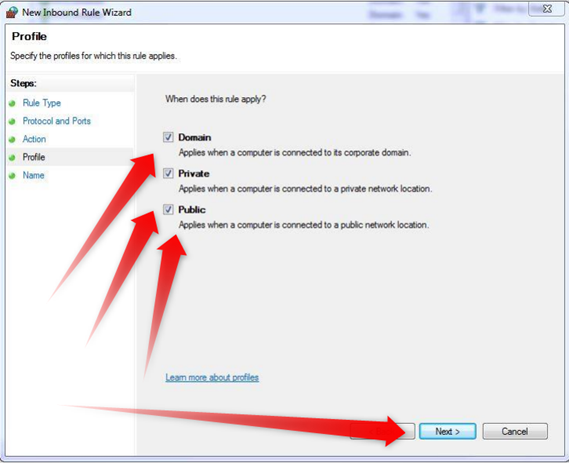
- Click Next
- Name the firewall exception Firebird Primary and select finish.
- The Port is now excepted.
- Add another inbound rule named “Firebird Guardian”, with a Port number of “4560”
Once Firebird Guardian is made an exception through the firewall.
- Navigate to C:\Program Files (x86)\Firebird\Firebird_*_*\Firebird.conf
- Right click Firebird.conf and Select Open
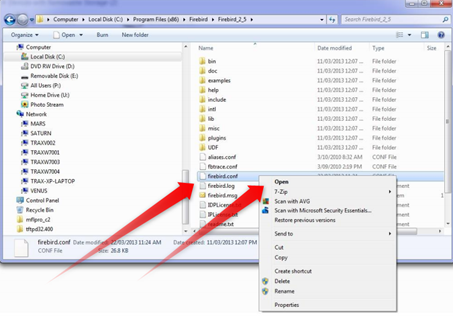
- Select Notepad to open the File and View.
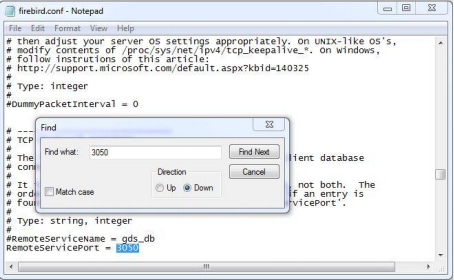
- Click Edit & Find, Type 3050 & Click Find Next
- You will see 3050 highlight and the line stating “#RemoteServicePort = 3050”
- Remove the # from the line.
- Line should now read RemoteServicePort = 3050
- Scroll down in the file and find #RemoteAuxPort = 0
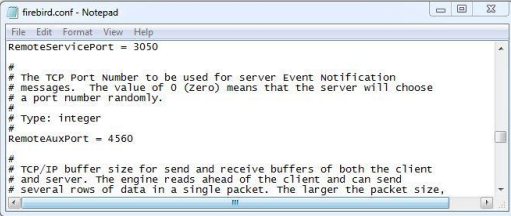
- Rename this line to “RemoteAuxPort = 4560”
- You will need to do this on each PC running Focus suite.
You have now allowed exceptions for the Firebird ports.
Continue to Part 5 Registering the Firebird database
PART 1: Installing Firebird Database
https://help.idealpos.co/part-1-installing-firebird-database
PART 2: Installing Focus Suite
https://help.idealpos.co/part-2-installing-focus-suite
PART 3: Grant Windows permissions on Idealpos & POSTEC Related Folders
https://help.idealpos.co/part-3-grant-windows-permissions-on-idealpos-postec-related-folders
PART 4: Opening Ports for the Firebird Database | Specify Ports for Firebird
https://help.idealpos.co/part-4-opening-ports-for-the-firebird-database
PART 5: Registering the Firebird Database
https://help.idealpos.co/part-5-registering-the-firebird-database
PART 6: PCC Network Setup & Connection Wizard (Single and MultiPOS)
https://help.idealpos.co/part-6-pcc-network-setup-connection-wizard
PART 7: Request Forecourt Configuration from the PCC
https://help.idealpos.co/part-7-request-forecourt-configuration-from-the-pcc
PART 8: Installing POSTEC License file
https://help.idealpos.co/part-8-installing-postec-licence-file
PART 9: Forecourt Manager- Add User Profiles & Attendants
https://help.idealpos.co/part-9-forecourt-manager-add-user-profiles-attendants
PART 10: Setting up Integration Mode / Adjusting Visual Console Appearance
https://help.idealpos.co/part-10-setting-up-integration-mode-/-adjusting-visual-console-appearance
PART 11: Idealpos Configuration and Start up sequence.
https://help.idealpos.co/part-11-idealpos-configuration-and-start-up-sequence
PART 12: Configuring the Master Database
https://help.idealpos.co/configuring-postec-master-database
PART 13: Setting up Windows Sharing for Master Database Configuration
https://help.idealpos.co/setting-up-windows-sharing-for-master-database-configuration