Shopify Plugin Configuration - Webit 4
Shopify is a retail eCommerce platform that makes it very fast & easy for a store to deploy an online shop. For more information on Shopify please go to www.shopify.com.au. Below are instructions to install & configure Webit 4 on Idealpos 7.
Instructions to configure:
1. Once you have your download of Webit v4 right click on the file and install or run as administrator.
2. Click next on the install window
3. Click accept to the terms and license agreement and click next.
4. Make sure the install is set to the default location of C:\Webit and click next.
5. Once that is done click finish and the install is complete.
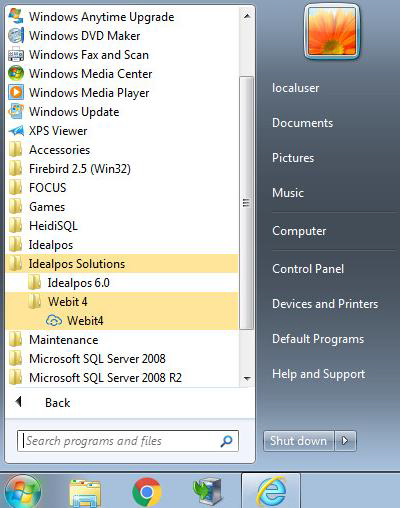
6. Click your start button and browse to the Idealpos Solutions then Webit or if you are using Windows 10 click on the start button click on all apps the Idealpos Solutions.
Windows 7

Windows 10

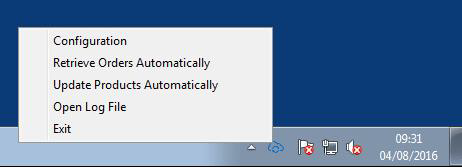
7. Next you will find the Webit icon in the system tray in the bottom right-hand side of the screen where your clock is located
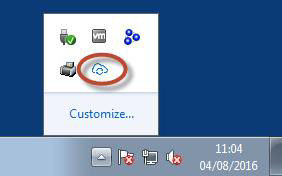
8. If you right click on the cloud icon you will see the Webit menu. To start you will want to click on configuration.

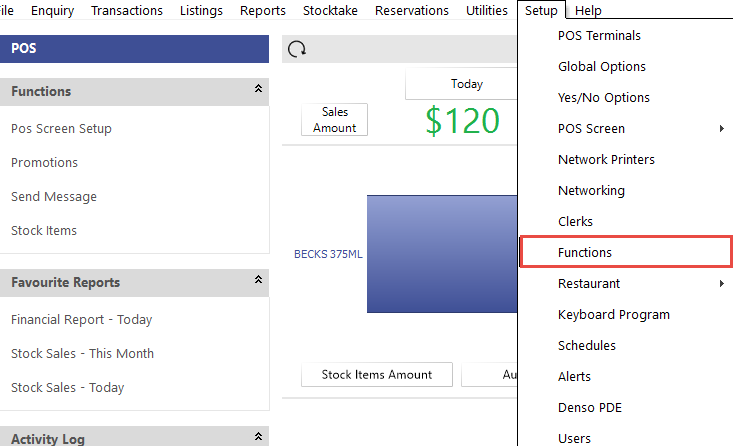
9. You will need to create a tender for online payments to be processed. In Idealpos go to setup and click on functions.
10. Select the next blank tender and click modify and rename it to ONLINE PAYMENTS or a name of your choosing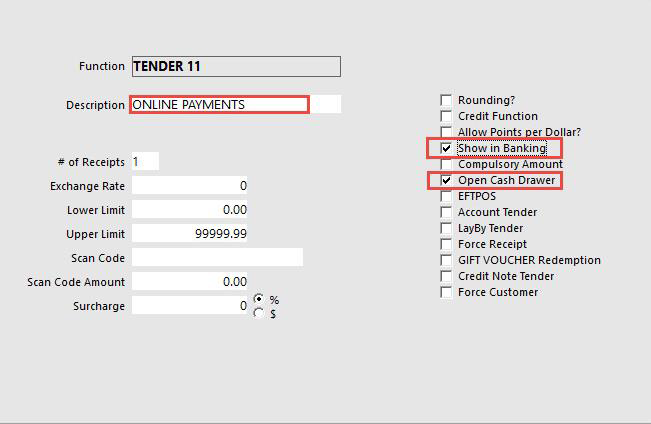
11. Go to global options and click on the tab interfaces 2. Here you can set your tender for webit to use when the orders are prepaid online. 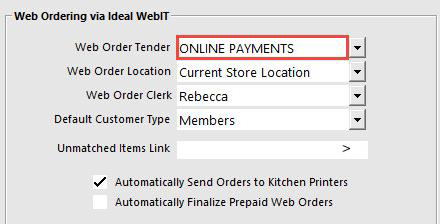
Windows 7
Windows 10

12. Next you will find the Webit icon in the system tray in the bottom right-hand side of the screen where your clock is located

13. If you right click on the cloud icon you will see the Webit menu. To start you will want to click on configuration.
14. Once the configuration window opens you will see the Webit plugins that are available to be configured on the left side. As a default they are all disabled. Click on Shopify in the left-hand panel to open the Shopify settings panel to the right.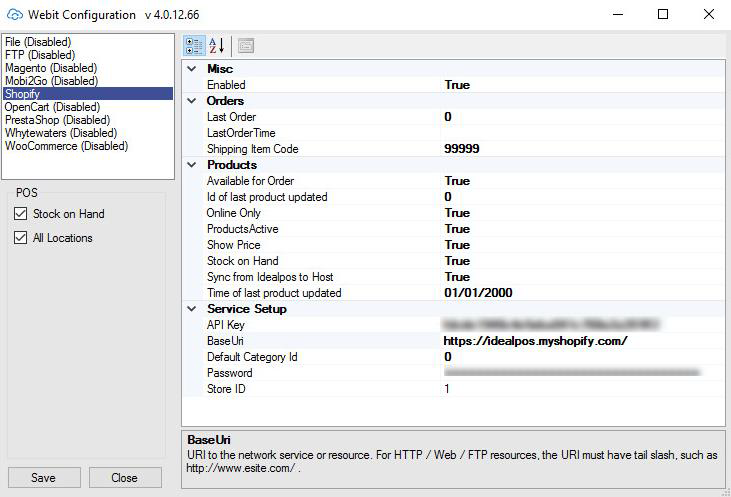
15. You will need some information from you Shopify admin page. This usually can be found at
www.YOURSHOP.myshopify.com/admin
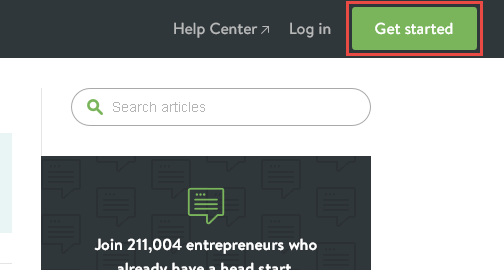
16. Once at your site in the top right-hand corner of the site click on the LOG IN button and login.
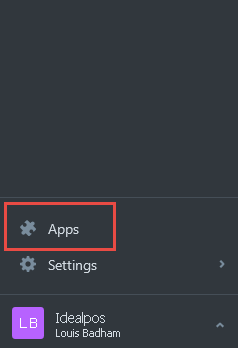
17. Once logged into your site go to the top left-hand side of the page and click on Apps.
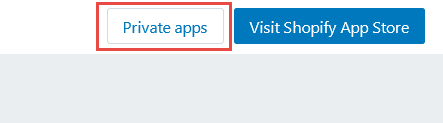
18. Once you are in Apps look to the top right of the page and find the Private apps button (or the Manage Private Apps link at the bottom of the page) and click on it.
19. Once in private apps click on Create private app button found at the top right of the page.

20. Once in create private app enter a description.

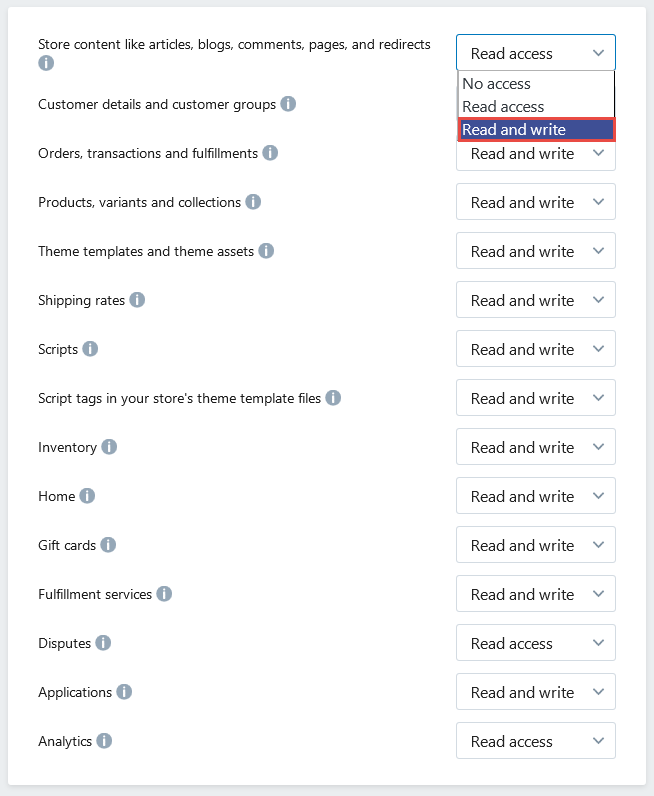
21. After entering your description select your app permissions. These permissions determine what data your app has access to. It is recommended that you enable only what is necessary for your app to work. A description of each permission can be found in our API reference on the Shopify site.
22. and click save at the bottom of the screen.

23. After you click save you will have access to the information you will are required to enter into the Webit app. Here you can find the API Key, password, shared secret and URI that is needed for the Webit configuration panel.
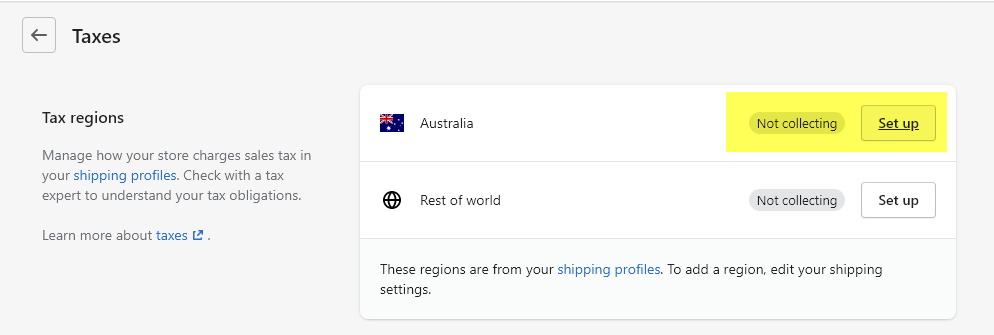
24. From the Shopify dashboard go to the bottom left of the page and click on settings then click on taxes.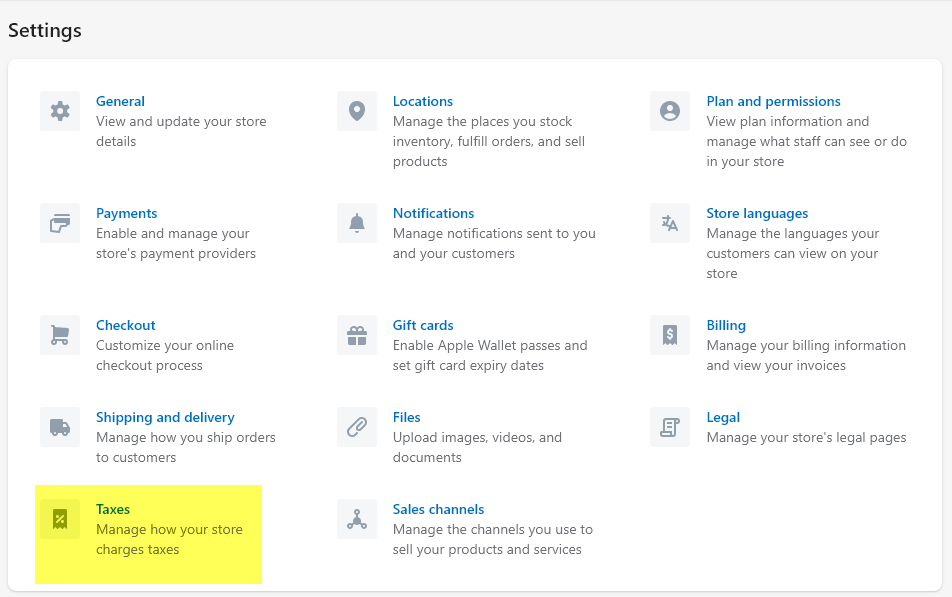
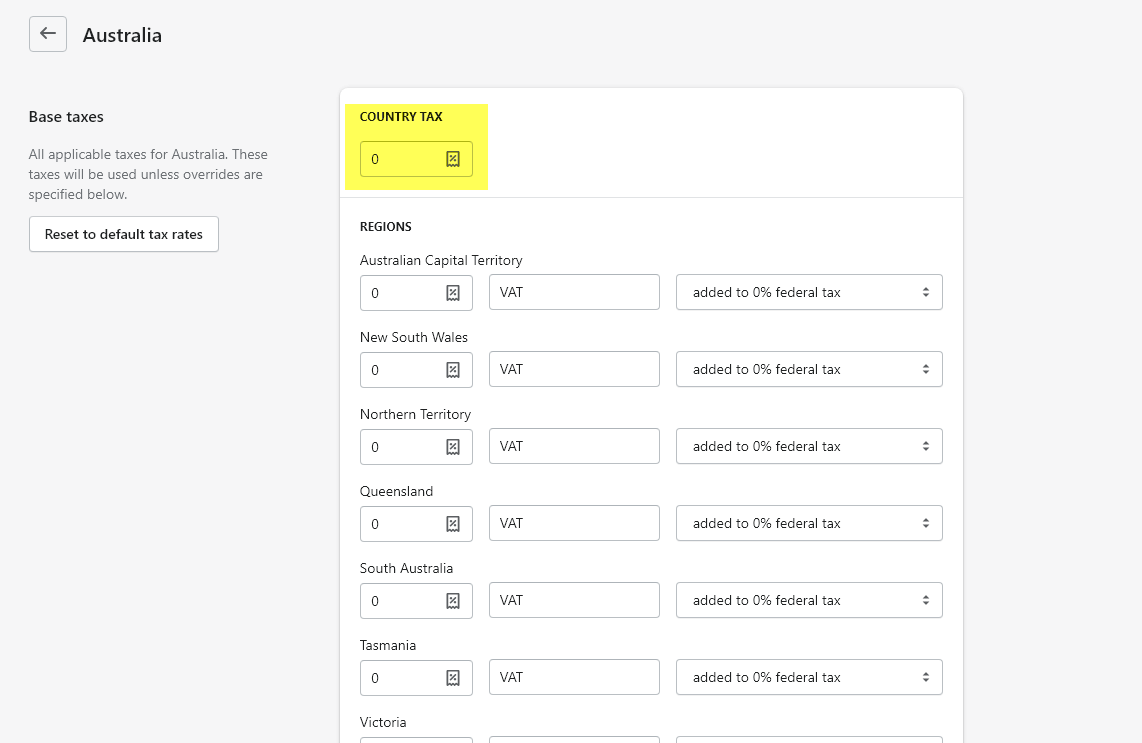
25. Once in settings by default you will see Australia set to collecting. Click the edit button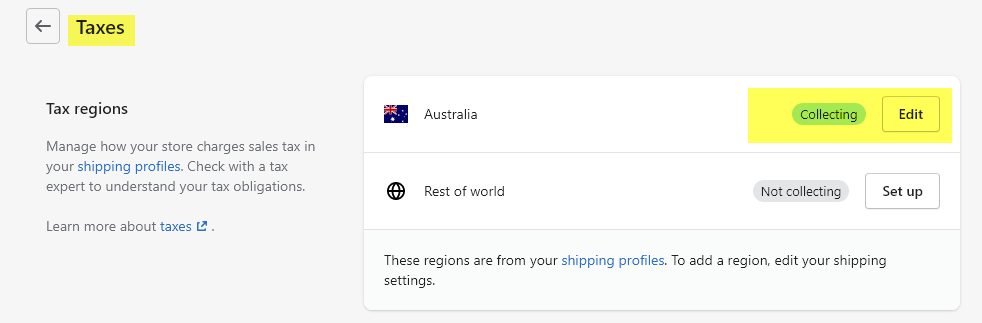
25.1 In the country tax box set the number to zero and click save.
26. With the information from (step 23) you can now input it into your webit configuration.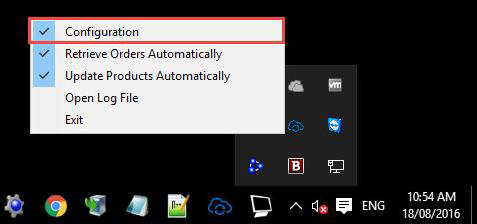
27. The other options you have to configure in the webit configuration are as follows. Store ID you should set this to (1) unless you have multiple shops then the ID would flow to suite the shops. Stock on hand is set to true to reflect your stock levels in Idealpos. (Image 27). Sync from Idealpos to host should be set to true so the selected products information is loaded to your site. 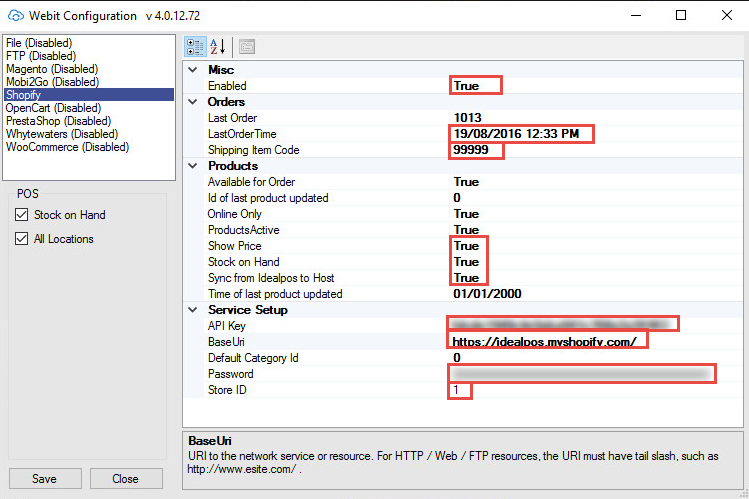
Stock items you wish to sell through your site have to be ticked web store under the stock item. Last order date should be set to the days date.
Enable should be set to TRUE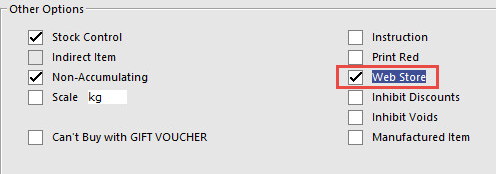
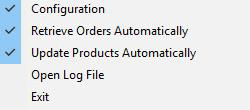
28. When you click on the webit icon you will also see RETRIEVE ORDERS AUTOMATICALLY which needs to be set to TRUE to retrieve orders from the site enabling them into Idealpos.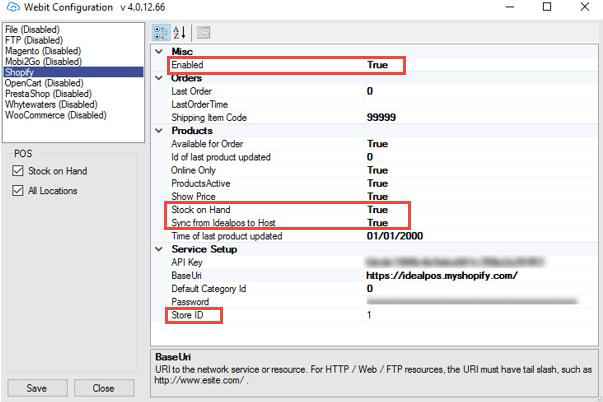
UPDATE PRODUCTS AUTOMATICALLY will sync the selected stock items you have previously ticked web store with stock item description cost and stock levels once you have created the stock items on the site.
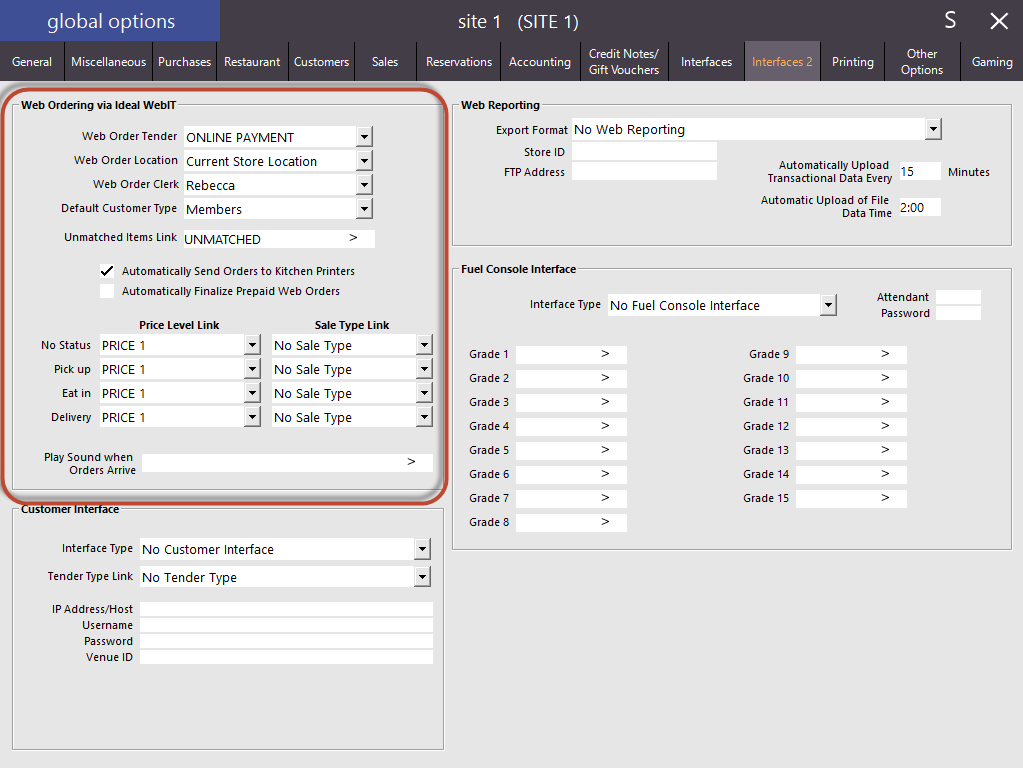
29. Under global option under the tab INTERFACES 2 you will find the web ordering via ideal webit configuration panel choose what options you will need for your setup.
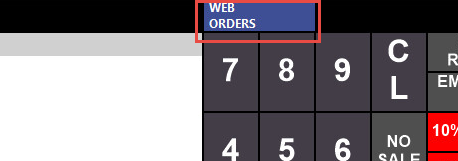
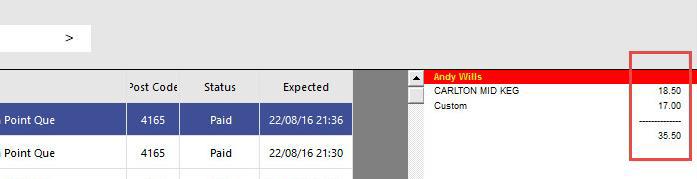
30. When the web order is received in Idealpos you will see the web orders button appear at the top of the POS screen. Click on it to access the pending web orders.
31. Once in the web orders screen you can see the web order that is waiting to be finalized. The code represents the web order and flows through the complete order from webit to pos to receipt.
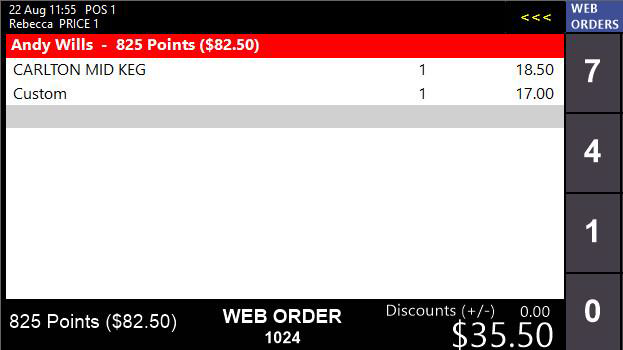
32. By clicking finalize this will bring the order into pos with its matching web order number to keep track of the order.
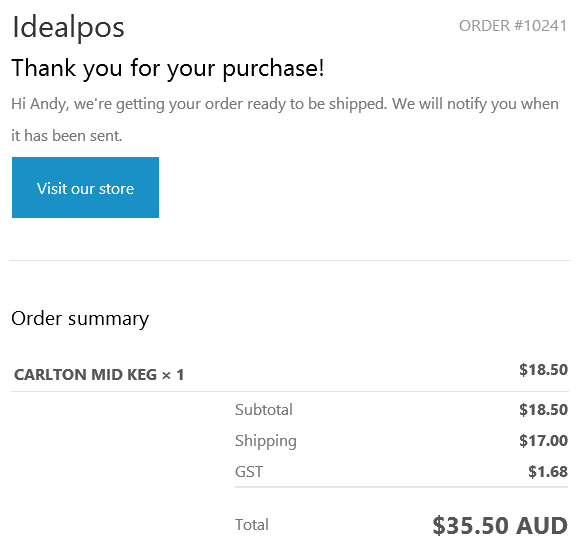
33. The client will receive an email similar to this and when the items are shipped, they will receive an acknowledgement email of the order being shipped.
34. When payment is received the order is brought into the pos screen to be finalized with matching web order codes.
Notes:
When uploading Products, the Idealpos Stock Item Description is written to the Shopify Title field, and the Idealpos Stock Notes text is written to the Shopify Description field. Note that there is no text in the Idealpos Stock Notes field, the Shopify Description is set as blank (even if a Description already exists).