How to network multiple terminals
The steps below cover how to setup a Idealpos Network & they should be carried out by an authorized Idealpos reseller. Be aware the steps below will send the database from one terminal to another which can result in data being lost if done incorrectly.
1. Select a Master Terminal - Typically the Backoffice
2. Go to Setup > POS Terminals
3. Add the required POS terminals into the list & name accordingly - The Code must match the POS # License
4. Exit & Save 
4. Go to Setup > Networking
5. Add the IP Address of the terminals into the Primary IP fields
6. Click OK & exit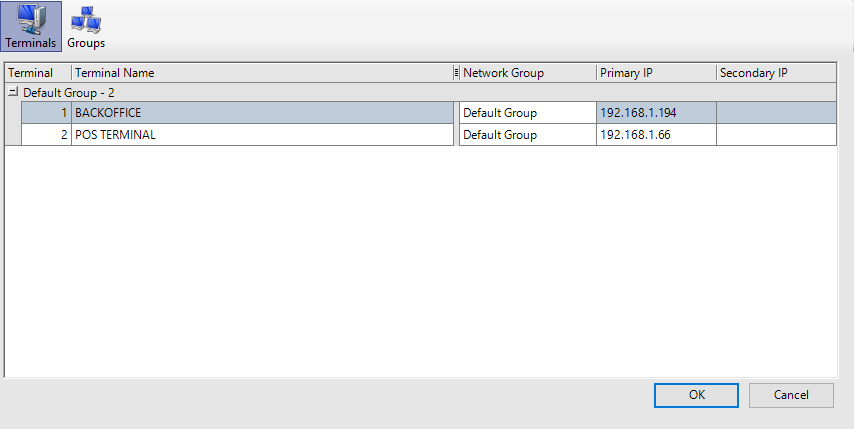
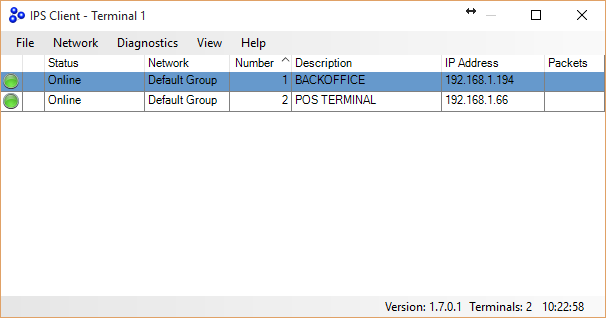
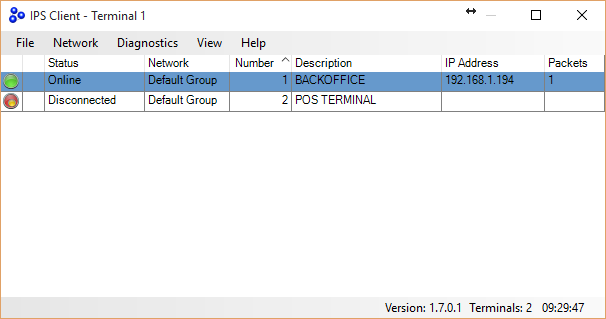
7. Locate IPS Client running in the task bar by the clock
8. The remote POS Terminal(s) will display a red dot to the left with a yellow dot - This indicates that this POS License can see it & the remote end can be pinged but has no knowledge of the master yet.
9. Now go to Network > Overwrite > Standard
10. Tick the terminals to be overwritten
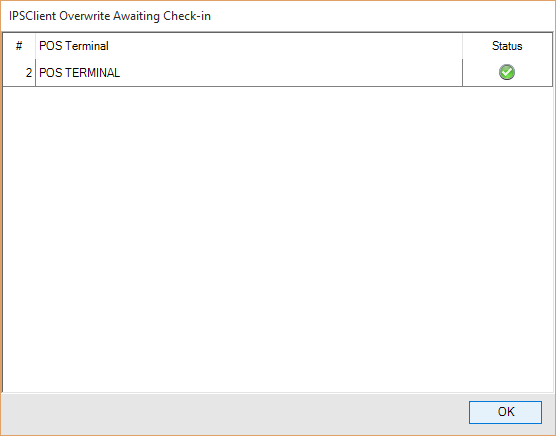
11. Select OK - This will now send the database 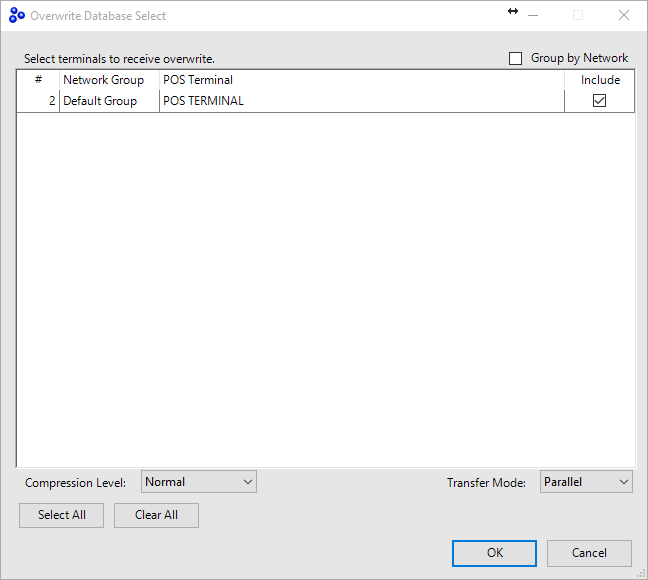
13. Click OK
Now if you open IPS Client the status should display all the terminals online - They will now synchronize data between each other