Using TP100 Printer with USB Connection
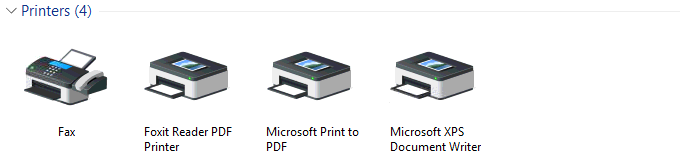
Ensure the printer isn’t configured as a Windows Printer, if it is, remove it.
It would normally show in this section under Devices and Printers.
Perform a test print from the printer by turning the printer off, holding the feed button in and then turning it back on.
Down the bottom of that print, you will find a Version and a date.
If it reads,
VERSION N177x_3.14 2020-02-14,
it will not be compatible to use with a USB Virtual COM and you will need to change the firmware of the printer.
If it reads
VERSION N177x_3.14 2019-03-20,
it is compatible with USB Virtual COM.
To change the firmware, run the SenorPrinterTool V2.2.exe, Check the USB radio button, click Download, select the firmware
"RP80USE_1776(600,70,640)_PageMode_vx3.14_USB_AS_COM_PRINT_20190320.bin", click Update.
Once the firmware has been changed, perform another test print to confirm the date at the bottom reads 2019-03-20
Run the SenorPrinterTool V2.2.exe, check the USB radio button. Cycle to the Other tab, change USB Set to Virtual Serial Port. Click Set.
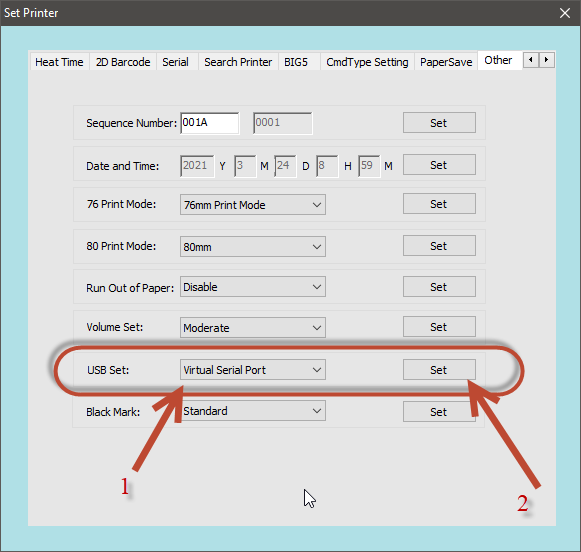
The printer will beep and will print out a USB SET SUCCESS! 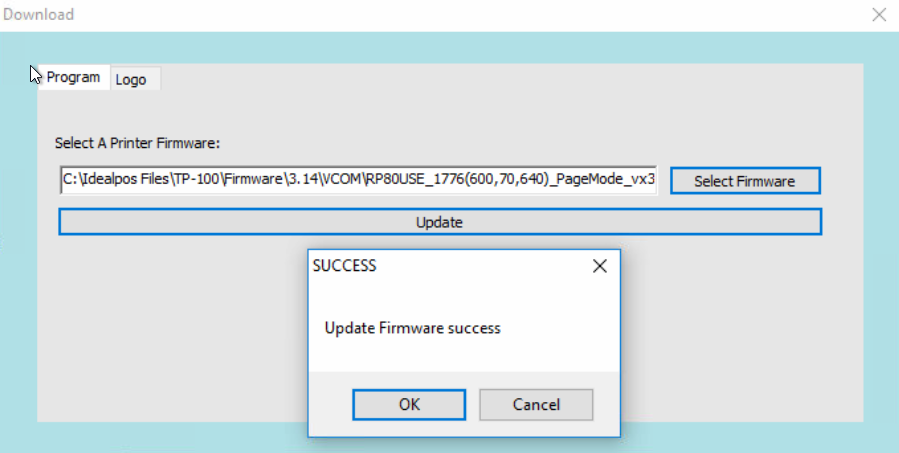
Restart the Printer
Run the PL2303_Prolific_DriverInstaller_v1.10.0.exe program. It will assign a COM Port in Device Manager that can be manually changed if needed.
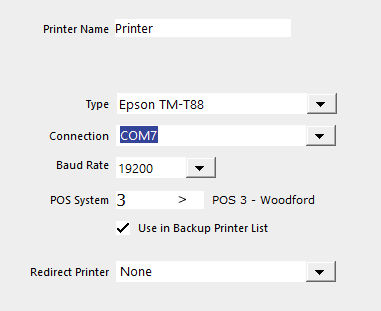
This printer can now be configured in Idealpos as a Network Printer using the COM Port setting from Device Manager.
Perform a test print to confirm it prints.
If it prints unreadable text, the Baud rate may need to be changed to match that of the printer. Change this in Idealpos to match.