USB Epson OPOS Printer Configuration for Idealpos
written by James
Install and configure Epson OPOS
- Power on and connect the printer to the POS terminal.
- Copy Epson OPOS (ADK280ER12.exe) to the POS terminal. This file can be downloaded from this link:
https://drive.google.com/file/d/1AFZzKwnDWeg_sU-6clWnLnjvRmx-vqk6/view?usp=sharing - Run ADK280ER12.exe:
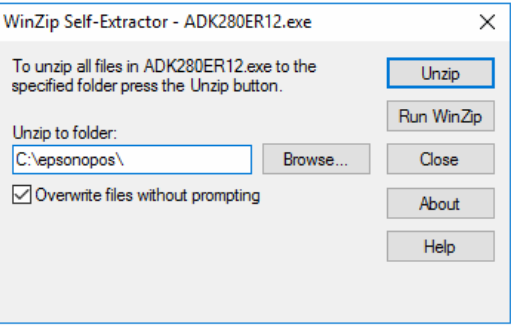
- This is a self-extracting zip file; select a destination to extract the files into, and then click Unzip).
- Run the extracted Setup.exe as administrator located in “Extracted path”\OPOSADK\ADK280ER12\Disk1
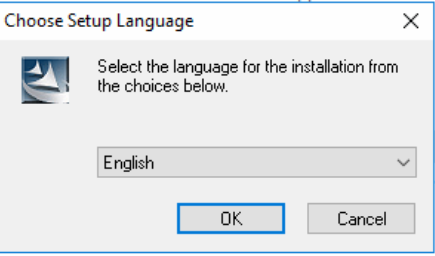
- Click OK
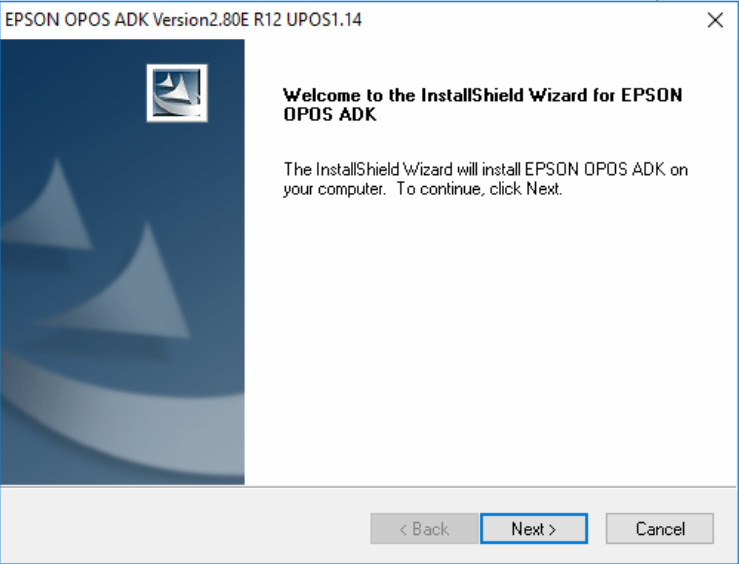
- Click Next.
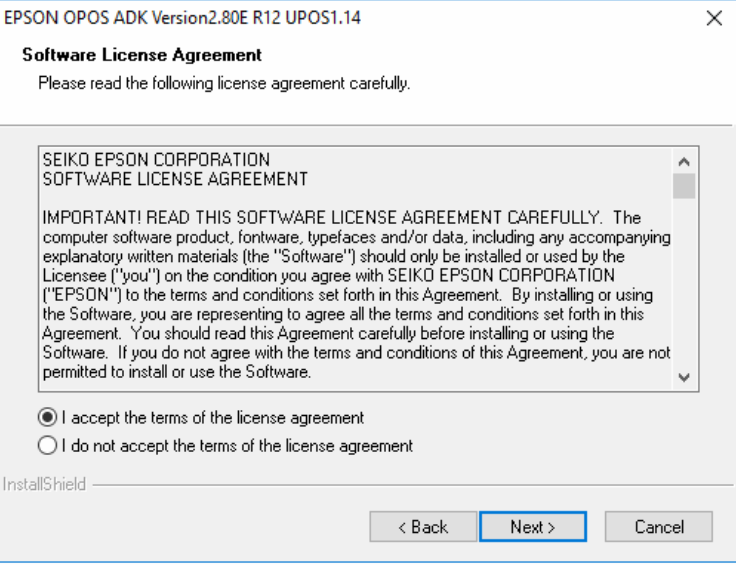
- Accept license agreement, and then click Next.

- Select No registry file, and then click Next.
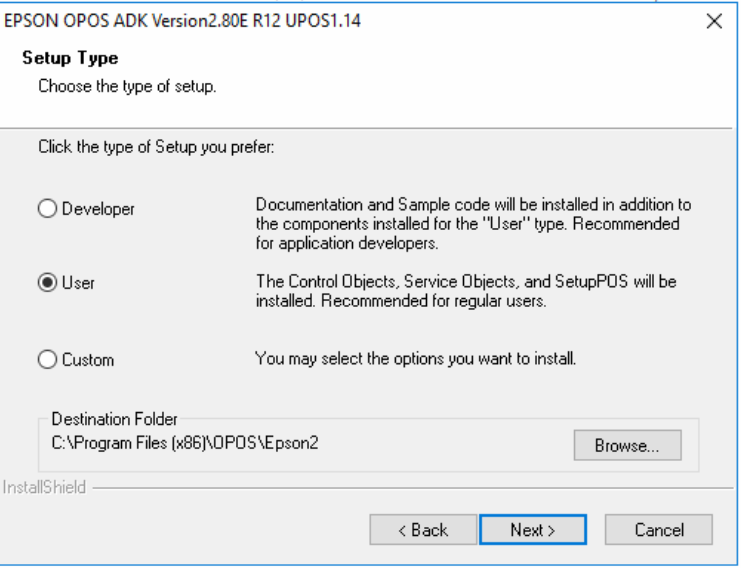
- Select User, and then click Next.
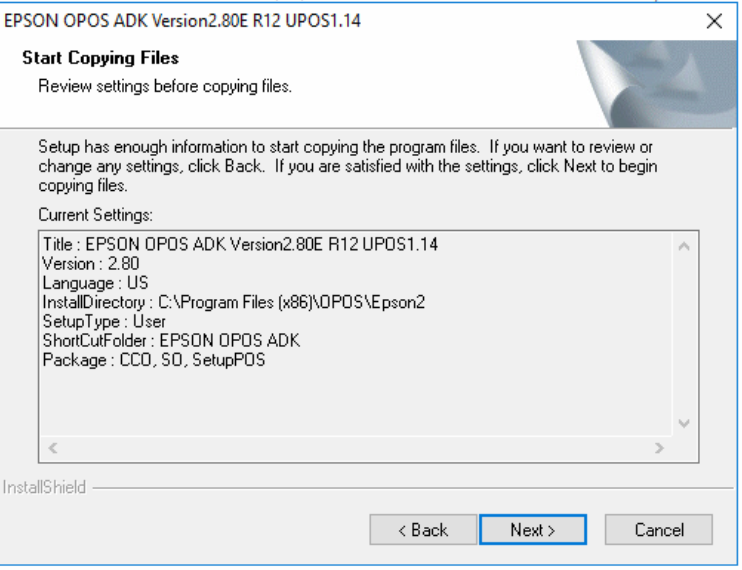
- Click Next to start copying files.
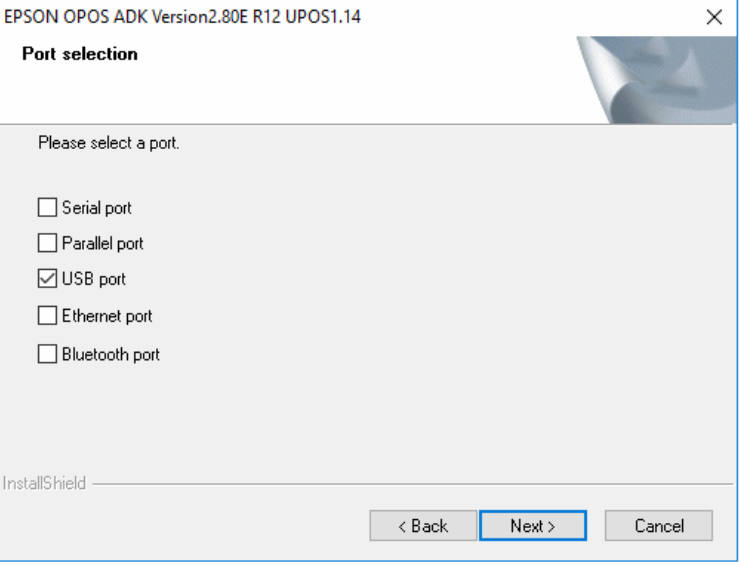
- Select USB port, and then click Next.
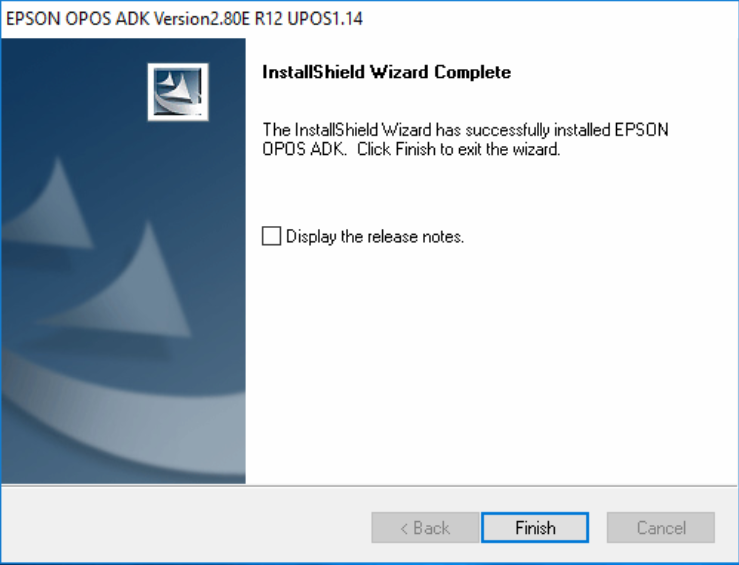
- Click Finish. The EPSON OPOS ADK will run automatically after installation.
In Device, right-click on POSPrinter and select Add New Device: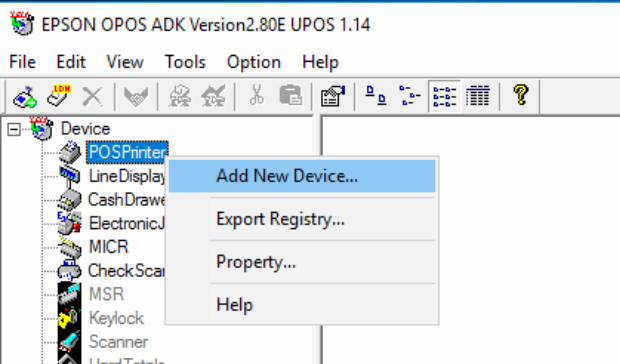
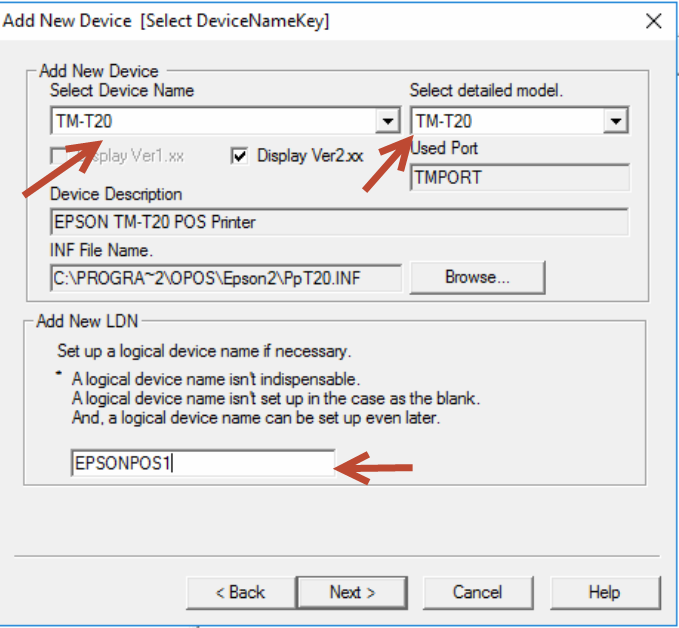
- Select the printer model in the Select Device Name drop-down list.
- If required, set further details in the select detailed model drop-down menu.
- Enter a Logical Device Name in the Add New LDN field. This logical device name will be used later when configuring the printer in Idealpos. The logical device name is a text string used to reference the printer. It is recommended that you do not use spaces for special characters. In this case we have used EPSONPOS1. The LDN can be changed later if required.
- Ensure the printer in powered on and connected so the TM Port Setting are automatically configured on the next step.
- Click Next:
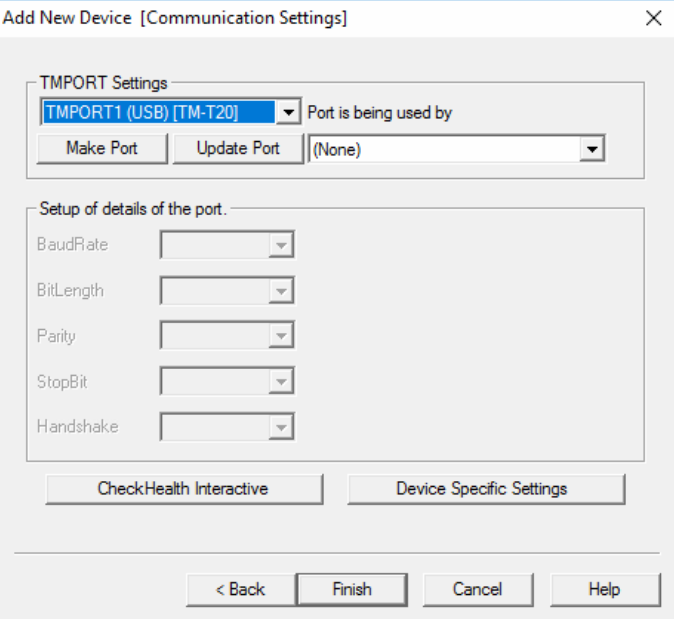
19. The TMPORT Settings field should auto populate with the USB port and printer.
20. Click Check Health Interactive: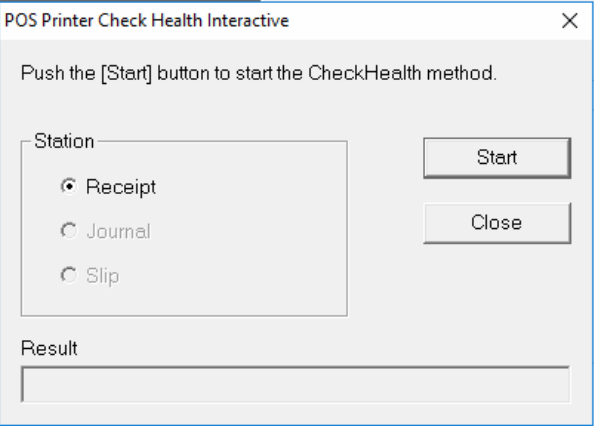
21. Select Receipt and click Start. A test print should occur.
22. Click Close.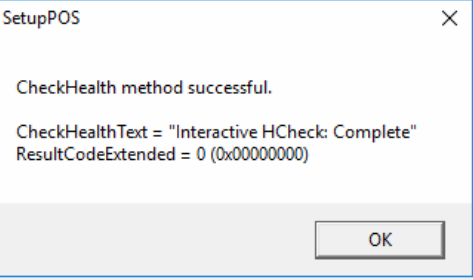
23. Click OK on successful message.
24. Click Finish and close Epson OPOS to finalize the Epson OPOS configuration.
Note that the Epson OPOS configuration tool can now be run from the start menu (if required) to change configuration or do test prints (health checks.)

Configure the Printer in Idealpos
- In Setup > Network Printers, add a printer.
Type = Epson TM-T88
Connection=OPOS
Device Name = EPSONPOS1 (as configured in Epson OPOS) - A Cash Drawer can be configured to fire from the printer.
Note: Restart the system after completing all steps if it does not print.
Also, may need to remove the printer from Windows printer list if it is already added. (This step may not be required)
Common OPOS installation
You must also run the Common OPOS 1.14 installer (OPOS_CCOs_1.14.001.msi), which is available from this link:
https://drive.google.com/file/d/1TjgC7kZXH49oJkC9R1aQ0G_TSmqhsha-/view?usp=sharing