Text Overlay - Ethernet
Idealpos interfaces with DVR/NVR to produce text overlay. Note that most DVR/NVR systems have a POS Interface box that is required; here are some we frequently see in the market:
- Dedicated Micros Sprite2
- Geovision
- HikVision
- Nuuo NVR Solo
Idealpos outputs ASCII text to an IP/Port or Serial port. Many NVR/DVR Systems accept this type of input in the market. This is commonly referred to as Epson Emulation; however, it is not guaranteed that Idealpos will work with every camera system that claims to have this emulation.
This configuration should be able to be used to provide a text overlay to a security DVR System. This is sometimes referred to as a Network Video Recorder (NVR) as opposed to a Digital Video Recorder (DVR). These settings are just a guide to what Idealpos has found works with most text overlay systems. You may need to discuss the requirements further with the security system provider.- Go to Printers & Faxes
- Select Add Printer
- Select Use the following port
- Enter the IP Address for the DVR to use in the printer's name or IP Address Field
(e.g. 192.168.1.36) - Select Custom, then select Settings
- In the Port Number field, enter a port number that the DVR will be receiving the text data on
- A screen will appear to check your settings
- Install the printer software, and select the manufacturer as Generic
- Enter the Printer Name (e.g. DVR1 for POS 1's text output)
- Select NO for this printer to be the default printer
- Select Share Name to enable this printer as a shared printer
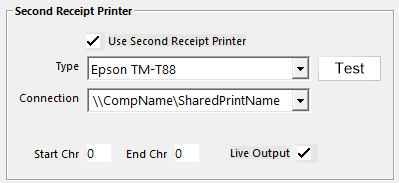
In Idealpos, the Share Name is used in the share path to point to this printer as the second receipt printer in Setup > POS Terminals > Receipt Printer: