QJumper : setup and use with WebIT
QJumper allows orders for to be placed and paid for in advance via a website.
As of August 2021, QJumper is now available through Idealpos Online's eCommerce Subscription service.
Prior to this, QJumper required legacy WebIT configured for FTP, with the orders sent to Idealpos, marked as paid, and processed automatically. This Solution is related to use with WebIT.
Webit Setup
1. Install Webit 4.0.12.89 or later
2. Find & Run Webit (It will then sit in task bar)
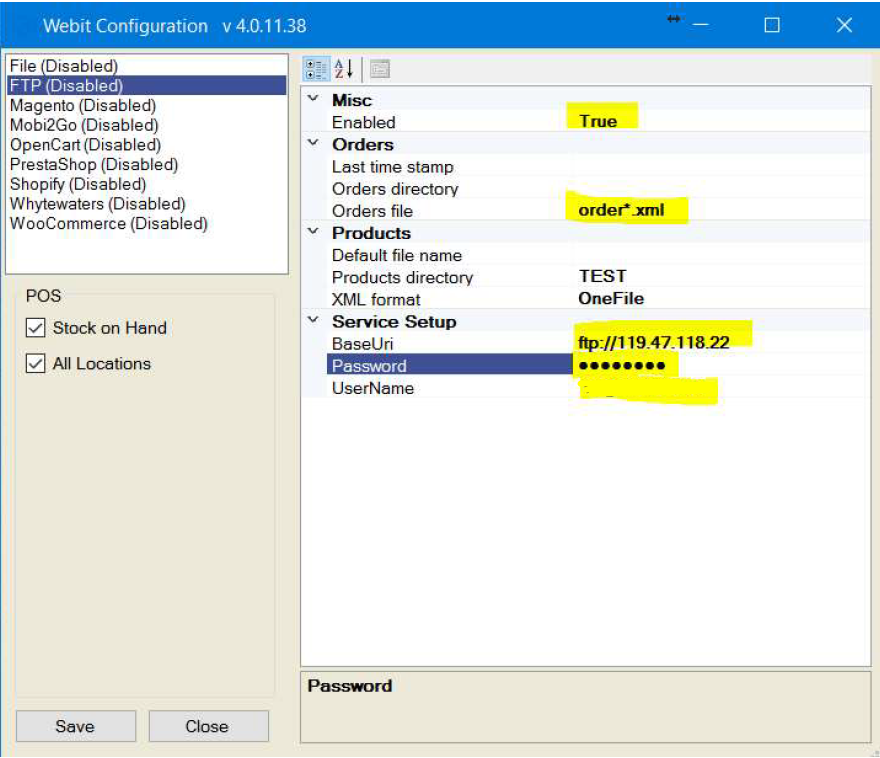
3. Right click & select Configuration
4. App Labs will provide FTP information highlighted below. User Name & P/W different for each site.
5. Save & Exit
6. Right click & select Retrieve Orders Automatically
Idealpos Setup
1. Setup a Clerk (e.g. Clerk 9998. with name of QJumper)
2. Setup Customer Type (e.g. QJumper Accounts)
3. Setup Tender Name (e.g. QJumper Orders)
4. Setup Stock item for Unmatched QJumper items. (e.g. Misc QJumper Item)
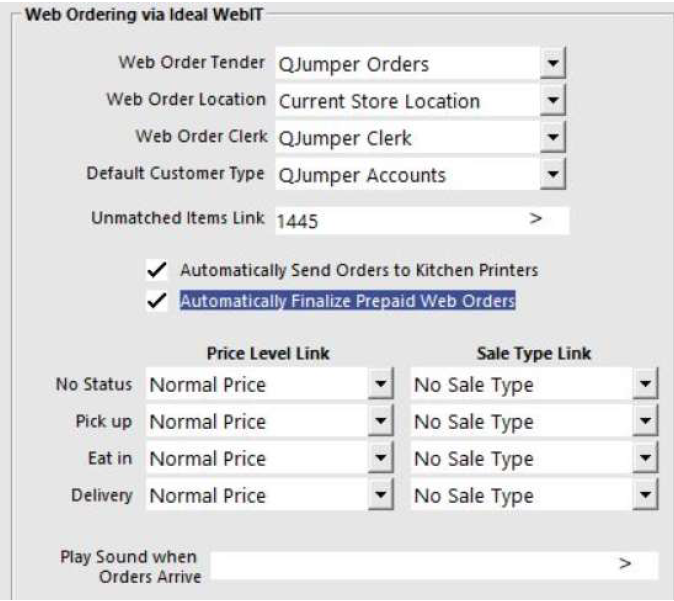
5. Go to Setup > Global Options > Interfaces2 & configure the steps above in Web Ordering Section
If using different pricing on App than used at POS, you must
setup a different price level, name it QJumper Price and
enter App prices there, then point all four price level Links
to that Level. This is to keep sales reports correct.
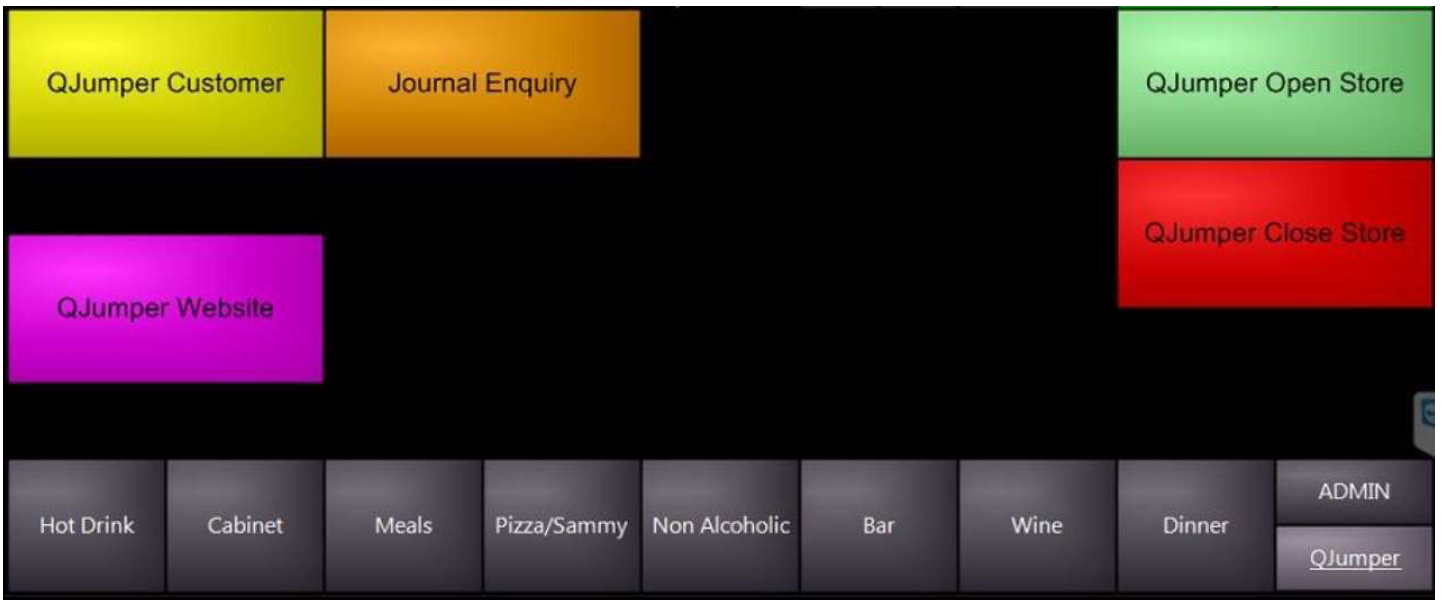
Setup QJumper layer. Under ADMIN layer.
“QJumper Customer” is a customer key with QJumper Customer Type. “Journal Enquiry” as normal.
“QJumper Website” is an “External Program” key with www.portal.qjumper.co.nz in the text field.
App labs will give User name and P/W, after first time used you can double click user name and user name and
password will auto populate.
“QJumper Open Store” and “Close Store” is an “External Program” key with details provided by APP LABS in the text
field. These details are unique to each customer. It hits the website which opens or closes the QJumper Store.
Orders from the QJumper App will send to the POS terminal, print and automatically be paid for. If for some reason the order didn’t print or customer queries an order, go to QJumper page, Select customer under “QJumper
Customers” button, then push “Journal Enquiry” key. Only transactions will be displayed from the selected customer. To remove customer from selection push “QJumper Customers” key then push “X” top right.
Item Setup:
Items for QJumper must be provided via an export CSV to App Labs, must include Stock Code, Description and Price.
Some resellers also provide them with a Backup, and screen dumps of their Hot Drinks page including extra grid if they have one.
Currently any additional items to be used in QJumper the client will go to QJumper website and add/Modify items,
They MUST match items in IdealPOS, i.e.:/ Stock Code and QJumper price level.